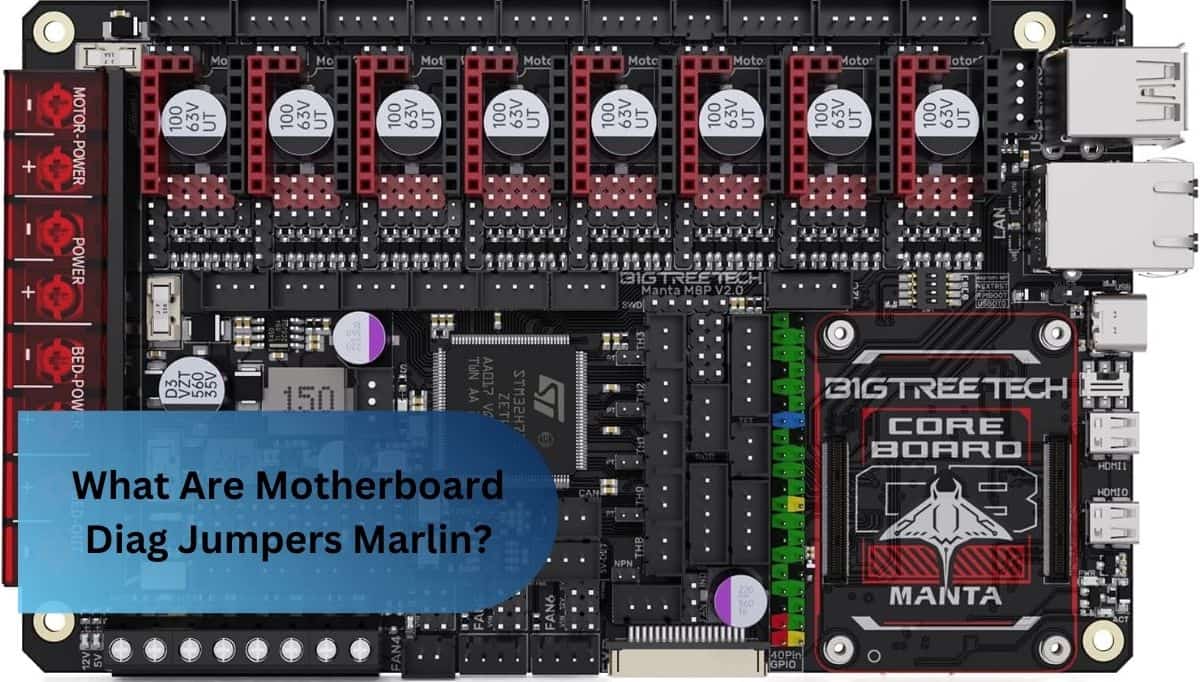
What Are Motherboard Diag Jumpers Marlin? – A Quick Guide!
When I first set up my 3D printer, the diag jumpers on my Marlin-compatible motherboard felt like a mystery. But after carefully reading the manual and tweaking them for sensorless homing, I saw a huge improvement in print precision. Now, I never skip this critical step in setup!
Motherboard diag jumpers on Marlin-compatible boards are tiny connectors that configure features like endstops and stepper drivers. They optimize 3D printer performance by enabling customization and troubleshooting for precise, efficient prints. Learn more here!
In this article, we will explore what motherboard diag jumpers are, their role in Marlin-compatible 3D printers, and how they enhance performance. From configuring endstops to troubleshooting issues, we’ll guide you through everything you need to know.
What Are Diag Jumpers On A Marlin-Compatible Motherboard?
Diag jumpers on a Marlin-compatible motherboard are small connectors or pins that enable users to configure and optimize specific functionalities of a 3D printer. These components are pivotal for diagnostic and customization purposes, allowing the motherboard to manage features such as endstop configurations, sensorless homing, and stepper motor driver settings.
By adjusting the placement of diag jumpers, users can modify hardware behavior to align with their printer’s specific requirements, improving performance and troubleshooting capabilities. Proper configuration of these jumpers ensures compatibility between the motherboard and Marlin firmware, enhancing precision and reliability in 3D printing operations.
How Do Motherboard Diag Jumpers Work?
Motherboard diag jumpers function as physical connectors that modify the operational behavior of a motherboard by enabling or disabling specific features. On Marlin-compatible motherboards, these jumpers are integral to configuring hardware components in 3D printers.
For example, they can be used to determine whether physical endstops or sensorless homing will be employed to detect the print head’s position. Additionally, diag jumpers allow adjustments to stepper motor drivers, such as enabling microstepping or setting current limits, which can significantly influence the printer’s precision, noise levels, and overall efficiency.
By bridging or leaving specific pins unconnected, diag jumpers act as manual switches, signaling the motherboard to activate or bypass particular features. This flexibility enables users to tailor their printer’s functionality to specific needs and optimize performance.
How To Adjust Diag Jumpers On Your Marlin-Compatible Motherboard?
Adjusting diag jumpers on a Marlin-compatible motherboard requires careful attention to the specific configuration needs of your 3D printer and adherence to the manufacturer’s documentation. The following steps outline the process:
1. Identify The Jumper Locations:
Begin by consulting your motherboard’s manual to locate the diag jumpers. These are typically found near headers for endstops or stepper motor drivers. Ensure that you correctly identify the pins relevant to the features you wish to configure.
2. Understand The Configuration Requirements:
Determine the desired functionality, such as enabling physical endstops, sensorless homing, or specific motor driver settings like microstepping. Refer to both the motherboard documentation and Marlin firmware guides to ensure compatibility.
3. Adjust The Jumper Settings:
Using a pair of tweezers or a similar tool, position the jumpers to bridge or unbridge the appropriate pins. For example, removing a jumper may disable physical endstops, while bridging specific pins might enable sensorless homing or adjust motor driver behavior.
4. Verify Firmware Compatibility:
Confirm that your changes align with the Marlin firmware settings. Adjust the firmware configuration as needed to reflect the physical jumper positions, avoiding conflicts that could hinder printer performance.
5. Test The Configuration:
After adjustments, conduct diagnostic tests to ensure proper functionality. This includes testing homing procedures, running small print jobs, and observing motor behavior for accuracy and efficiency.
Properly adjusting diag jumpers enhances the flexibility and performance of your 3D printer, ensuring seamless integration between hardware and firmware. Always handle jumpers carefully and follow safety precautions to prevent damage to the motherboard.
Why Are Diag Jumpers Important On Marlin Motherboards?
- Customization of Endstops: Diag jumpers allow users to configure between physical endstops and sensorless homing, ensuring precise and reliable homing for 3D printers.
- Stepper Motor Driver Adjustments: These jumpers enable modifications to stepper motor settings such as microstepping and current limits, influencing performance, noise levels, and print quality.
- Facilitates Diagnostic Troubleshooting: Diag jumpers enable advanced diagnostic modes in Marlin firmware, providing deeper insights into printer functionality for effective issue resolution.
- Enhances Flexibility and Performance: By offering hardware configuration flexibility, diag jumpers ensure that the printer operates efficiently and can be tailored to specific needs.
- Prevents Hardware and Firmware Conflicts: Proper jumper configuration is crucial to avoid issues and ensure optimal synchronization between hardware and firmware.
Where Can I Find Diag Jumpers On My Marlin-Compatible Motherboard?
Diag jumpers on Marlin-compatible motherboards are typically located near specific components such as endstop headers and stepper motor driver sockets. The exact placement can vary depending on the motherboard model, but they are usually positioned close to the relevant pins that control key functions like motor configuration or endstop settings.
To find the diagnostic jumper on your specific motherboard:
- Consult the Motherboard Manual: The manual or technical documentation provided by the manufacturer is the most reliable source for identifying the exact location of diag jumpers. It will include a diagram or a pinout chart indicating jumper positions.
- Look Near Endstop and Motor Driver Headers: Diag jumpers are commonly found around the areas where the endstop switches or stepper motor drivers are connected. These areas are critical for configuring features such as sensorless homing or motor current settings.
- Check for Marked Pin Headers: The pins for diag jumpers are often labeled or marked on the motherboard. Common labels might include “EN” for enabling endstops or “STP” for stepper motor configuration.
- Examine the Circuit Board: If the documentation is unavailable, visually inspect the motherboard for small, unconnected pins or headers, typically grouped together, that may be used for jumper placement.
For precise adjustments and configurations, it is essential to refer to the motherboard’s schematic to ensure the correct identification and placement of diag jumpers.
Common Issues And Troubleshooting With Diag Jumpers:
Common issues and troubleshooting related to diag jumpers on Marlin-compatible motherboards often stem from incorrect jumper placement, firmware conflicts, or compatibility issues with the motherboard. Addressing these concerns requires careful diagnosis and systematic troubleshooting.
1. Incorrect Jumper Placement
- Issue: One of the most frequent problems arises from the improper placement of diag jumpers, which can lead to malfunctioning endstops or stepper motor drivers. Incorrect jumper settings may cause the 3D printer to fail in homing operations or produce inaccurate prints.
- Troubleshooting: Carefully review the motherboard’s documentation and double-check jumper positions against the desired configuration. Ensure that each jumper is correctly aligned with the appropriate pins for endstop or motor driver adjustments.
2. Firmware Conflicts
- Issue: Another common problem occurs when the Marlin firmware configuration does not match the physical jumper settings. This mismatch can result in faulty printer behavior, such as incorrect motor movement or non-functioning endstops.
- Troubleshooting: Ensure that the Marlin firmware settings are properly adjusted to reflect the jumper configurations. This includes verifying the settings for endstop types, stepper motor drivers, and any diagnostic features enabled by the jumpers.
3. Component Compatibility
- Issue: Not all motherboards or components may be compatible with all types of diag jumper configurations. Incompatible jumpers can cause erratic behavior or prevent certain features from functioning.
- Troubleshooting: Consult the motherboard’s user manual and ensure compatibility with the specific diag jumper configurations you intend to use. Cross-reference these settings with the Marlin documentation to ensure proper functionality.
4. Unintended Hardware Behavior
- Issue: Diag jumpers, when improperly configured, can cause unintended behaviors such as motors running at excessive speeds, missing steps, or failure to detect endstop positions.
- Troubleshooting: Test the 3D printer after any jumper adjustment. If anomalies occur, recheck the jumper placement and ensure that firmware settings align with hardware changes. Additionally, conducting diagnostic tests can help isolate the source of the issue.
By addressing these common issues and following the appropriate troubleshooting steps, users can ensure that diag jumpers are configured correctly, leading to improved printer performance and reliable operation.
FAQ’s
1. What Does A Jumper On A Motherboard Look Like?
A jumper on a motherboard typically appears as a small, rectangular plastic connector that bridges two or more metal pins. It is often used to enable or disable specific features or configurations on the motherboard, such as enabling diagnostic modes or adjusting hardware settings.
2. What Is The Purpose Of Jumpers?
The purpose of jumpers is to configure or modify hardware settings on a motherboard by bridging specific pins, thereby enabling or disabling certain functions such as diagnostic modes, hardware features, or configuration options.
3. How Do I Manually Jump My Motherboard?
To manually jump your motherboard, locate the appropriate jumper pins on the motherboard, then use a jumper cap to bridge the designated pins according to the desired configuration, as specified in the motherboard’s manual or documentation.
4. Can Diag Jumpers Be Used To Control Stepper Motor Drivers?
Yes, diag jumpers can be used to control stepper motor drivers by enabling or disabling specific features, such as microstepping or adjusting current limits, which directly impact the motor’s performance and efficiency.
5. Do Motherboards Still Use Jumpers?
While modern motherboards have largely transitioned to software-based configuration methods, jumpers are still used in certain applications for hardware configuration, such as enabling specific features or controlling diagnostic settings.
Conclusion:
In conclusion, diag jumpers on Marlin-compatible motherboards play a crucial role in configuring and optimizing 3D printer functionality. They provide flexibility in adjusting hardware settings, such as endstops and stepper motor drivers, allowing for improved performance and customization. Properly configuring these jumpers ensures smooth operation, while incorrect settings can lead to issues such as misprints or hardware malfunction. Therefore, understanding the purpose and correct usage of diag jumpers is essential for maximizing the efficiency and reliability of a 3D printing setup.